Description
We hope you enjoyed the Webinar on Looking at the role that the Fill or Tatami
Stitch plays in our Designs.
Our Homework is stitching out the exercises you saw demonstrated in our Class. Watch them run to see how the difference the angle of the stitch, the density, and the length of the stitch makes.
You will Not need to actually digitize most of these exercises. However, you may need to change Lengths and Densities as well as Partition Lines or Offset Fractions to control the texture of your Fill in one or more of these examples to see what happens.
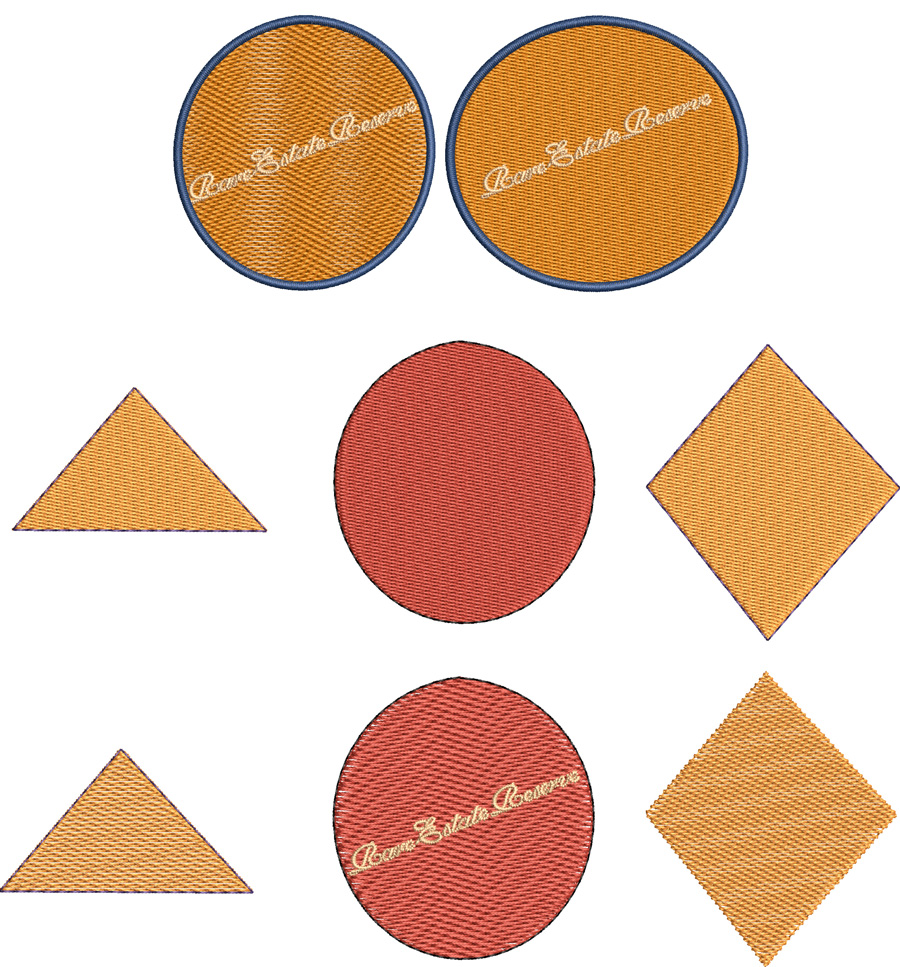
The 2 images, BT-9102, across the top are the construction of a Fill or Tatami stitch; the First is a layered Fill. All three layers are the same color and are one third density. This means that if the circle at default, or full density, is 1500 stitches, then each layer of the three layers should be one third of that or 500 stitches. Notice how each layer is programmed at the same angle, horizontal. Notice also how when the first layer is complete the second layer begins where the first layer ended. Also, the edge run underlay runs after the first layer is stitched. See how the column around the layered fill uses the edge run under the second layer of the fill to hold the column in place. You can experiment by programming your own layered fill and omitting the Edgerun underlay to see if the column outline is distorted, if you like
The second image is a traditional Fill or Tatami. This is one layer at full, or default density. There are two underlays under this fill. The first is an Edgerun, the second is the Double Tatami Underlay. (If you cannot program two underlays automatically, you will have to program the edgerun underlay manually.) Watch as the first underlay goes down. Then, as the second underlay, the Double Tatami, goes down and the stitches are thrown slightly past the running Stitch Edgerun. Notice how part of the tatami is executed, then the second part. The first section pushes the material toward the center of the circle, then the second part of this layer of the Double Tatami stitches from the opposite side toward the center of the circle. Is it causing a pocket of material? Would it cause a pocket of material with a buoyant fabric or with your moisture-wicking fabrics? AND when the full density fill is completed, does the column stitch outline line up with the fill?
Finally, in stitching the small letters on top of the layered fill, versus the full-density fill, do you see a difference in the clarity of the letters?
Next, you have three objects to stitch out, the Triangle, the Circle, and the Diamond. First with a full density fill, with an Edgerun Underlay and a Double Tatami Underlay, and the second is the layered version of the same fill. Each of these has a single Running Stitch outline. The lineup is perfect on the screen. How is the lineup of the outlines when you stitch out each object?
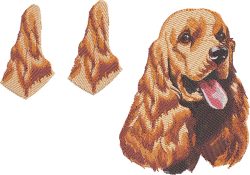
Next is a Second design, the Design of our Cocker Spaniel BT-9102A, or Homework #3A. You will have to access this separately.
There are two mini sections of the ears to demonstrate a Fill on top of a Fill. The first section has a background fill that runs horizontally. similar to the complete design to the right. Notice how the stitches on the horizontal fill stand up and become three-dimensional. The second has the beige background fill running vertically. Notice how the vertical layers on top of the beige fill start to blend in while those stitches programmed at different angles do not.
These examples should help you visualize different techniques we demonstrated in our Class and should give you the information needed for the decisions you, as a Digitizer, will make about using your Fill Stitch to its fullest!
In our next Class, we will be adding lettering to what you need to know as a digitizer! This will be both keyboard, and custom lettering, as well as taking keyboard lettering and customizing it for your Customer who has a special font or alphabet. See you then!
You no longer need a Coupon Code to access these Designs, as the price is marked at $0. Enjoy


Reviews
There are no reviews yet.